
 지혜의 개발공부로그
iOS 레이아웃이 깨졌을때 할 수 있는 방법?!
26 Feb 2021 | iOS개인공부 후 자료를 남기기 위한 목적임으로 내용 상에 오류가 있을 수 있습니다.
시작해보기
프로젝트를 진행하다보니 앱을 실행시킬때마다 엄청 지저분한 메시지들이 우두두두두 쏟아지는 것을 볼 수 있었다.
[LayoutConstraints] Unable to simultaneously satisfy constraints.
	Probably at least one of the constraints in the following list is one you don't want.
	Try this:
		(1) look at each constraint and try to figure out which you don't expect;
		(2) find the code that added the unwanted constraint or constraints and fix it.
(
    "<NSLayoutConstraint:0x60000012ba20 UIView:0x7feb9bc4e7c0.width == 335   (active)>",
    "<NSLayoutConstraint:0x60000012be30 H:[UIView:0x7feb9bc4e7c0]-(20)-|   (active, names: '|':UITableViewCellContentView:0x7feb9bc1e4e0 )>",
    "<NSLayoutConstraint:0x60000012bd90 H:|-(20)-[UIView:0x7feb9bc4e7c0]   (active, names: '|':UITableViewCellContentView:0x7feb9bc1e4e0 )>",
    "<NSLayoutConstraint:0x60000016c690 'fittingSizeHTarget' UITableViewCellContentView:0x7feb9bc1e4e0.width == 414   (active)>"
)

Will attempt to recover by breaking constraint
<NSLayoutConstraint:0x60000012ba20 UIView:0x7feb9bc4e7c0.width == 335   (active)>

Make a symbolic breakpoint at UIViewAlertForUnsatisfiableConstraints to catch this in the debugger.
말 그대로 레이아웃이 꺠졌다는 의미이다.
막상 앱을 실행시켰을때는 에러도 없고, 눈에 보이는 레이아웃에는 문제가 없어보이지만 실제로는 고쳐야할 요소가 있다는 의미이다.
레이아웃을 쉽게 고치는 방법에 대해서 알아봅시다.
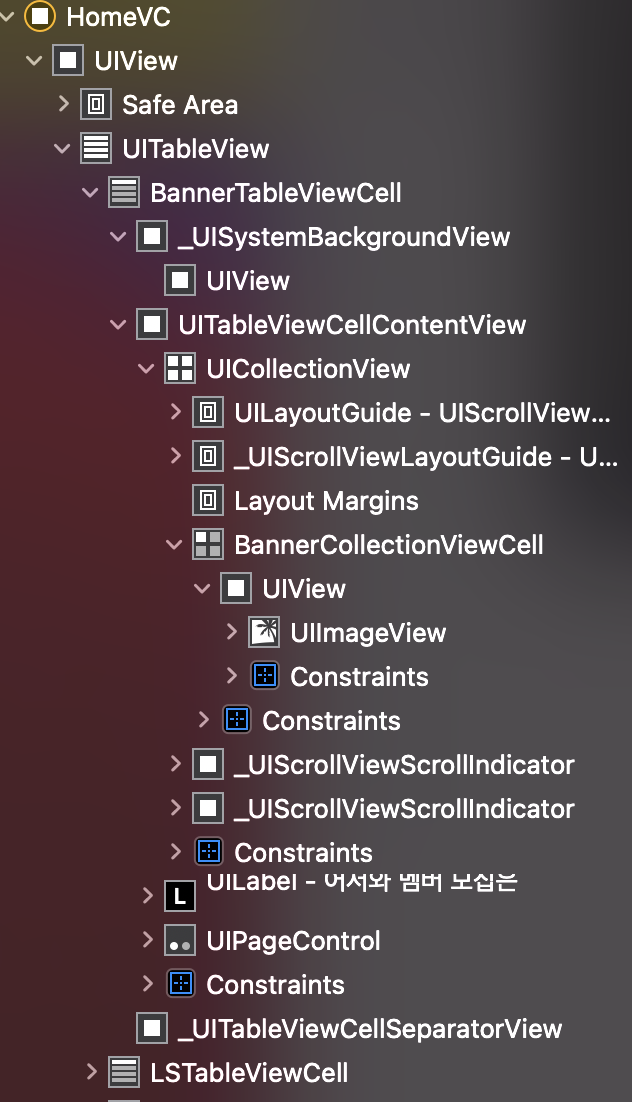
1. view Hierarchy 를 캡쳐

여기서 맨 마지막 아이콘을 누르게 되면 스토리보드의 화면이 아래와 같이 변한다.
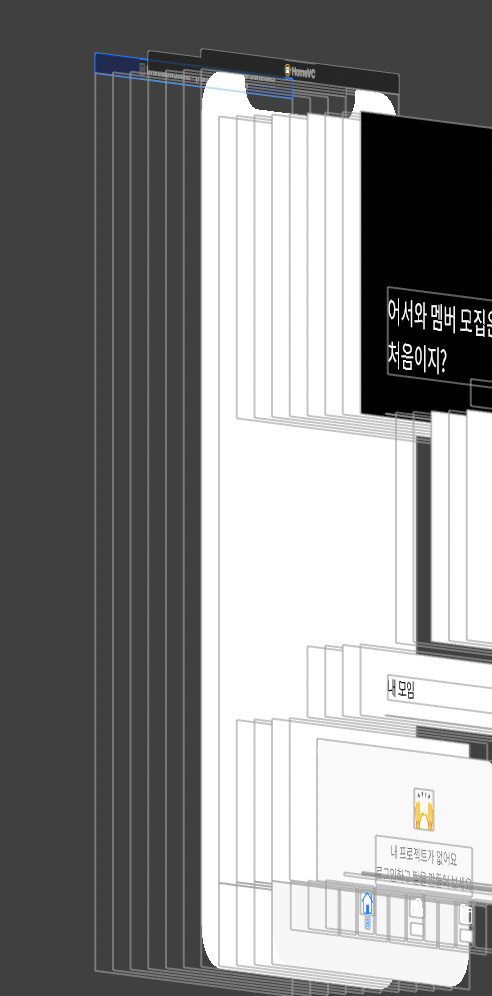
보다 정교하게 UI를 분석할 수 있으며, 아래 네비게이터를 보면 계층구조와 제약조건을 볼 수 있게 된다.
만약 여기서 중복되어 적용된 레이아웃이 있다면 오른쪽에 보라색으로 느낌표가 뜰 것이다.
2. breakPoint 사용
xib나 storyboard같은 UI Builder 사용하여 만들면, 레이아웃이 중복적용되어있거나 빠져있는 경우에 경고를 날려준다. 하지만, 코드로 구성할 때는 이를 알 수 없고 아까 위에서처럼 단순히 메시지만 던져주게 된다.
이때 중점적으로 볼 메시지는 아래와 같다.
Make a symbolic breakpoint at UIViewAlertForUnsatisfiableConstraints to catch this in the debugger.

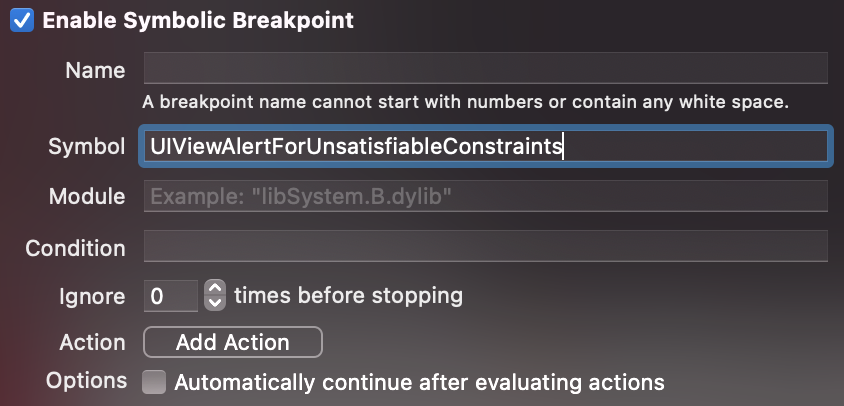
위 아이콘을 클릭해 브레이크포인트를 만들어봅시다. 우리가 만들 브레이크 포인트는 symbolic breakpoint입니다.
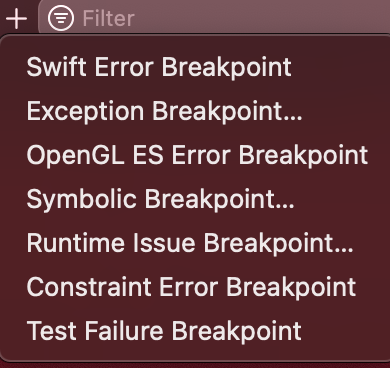
+버튼을 눌러 symbolic breakpoint를 누르고 심볼 부분에 UIViewAlertForUnsatisfiableConstraints를 작성해줍니다.
이후 앱이 깨지는 부분으로 돌아가 고쳐주면 됩니다 :)
3. WTF Auto Layout
마지막으로는 WTF Auto Layout입니당.
왓더..ㅍ..이 아닌 Why The Failure의 약자로 여기로 들어가보면 바로 실행해볼 수 있다.
위에서 받은 메시지 중 아래를 통해 실행해본다.
"<NSLayoutConstraint:0x60000012ba20 UIView:0x7feb9bc4e7c0.width == 335   (active)>",
"<NSLayoutConstraint:0x60000012be30 H:[UIView:0x7feb9bc4e7c0]-(20)-|   (active, names: '|':UITableViewCellContentView:0x7feb9bc1e4e0 )>",
"<NSLayoutConstraint:0x60000012bd90 H:|-(20)-[UIView:0x7feb9bc4e7c0]   (active, names: '|':UITableViewCellContentView:0x7feb9bc1e4e0 )>",
"<NSLayoutConstraint:0x60000016c690 'fittingSizeHTarget' UITableViewCellContentView:0x7feb9bc1e4e0.width == 414   (active)>"
위 메시지를 고대~로 복사붙이기 해준다.
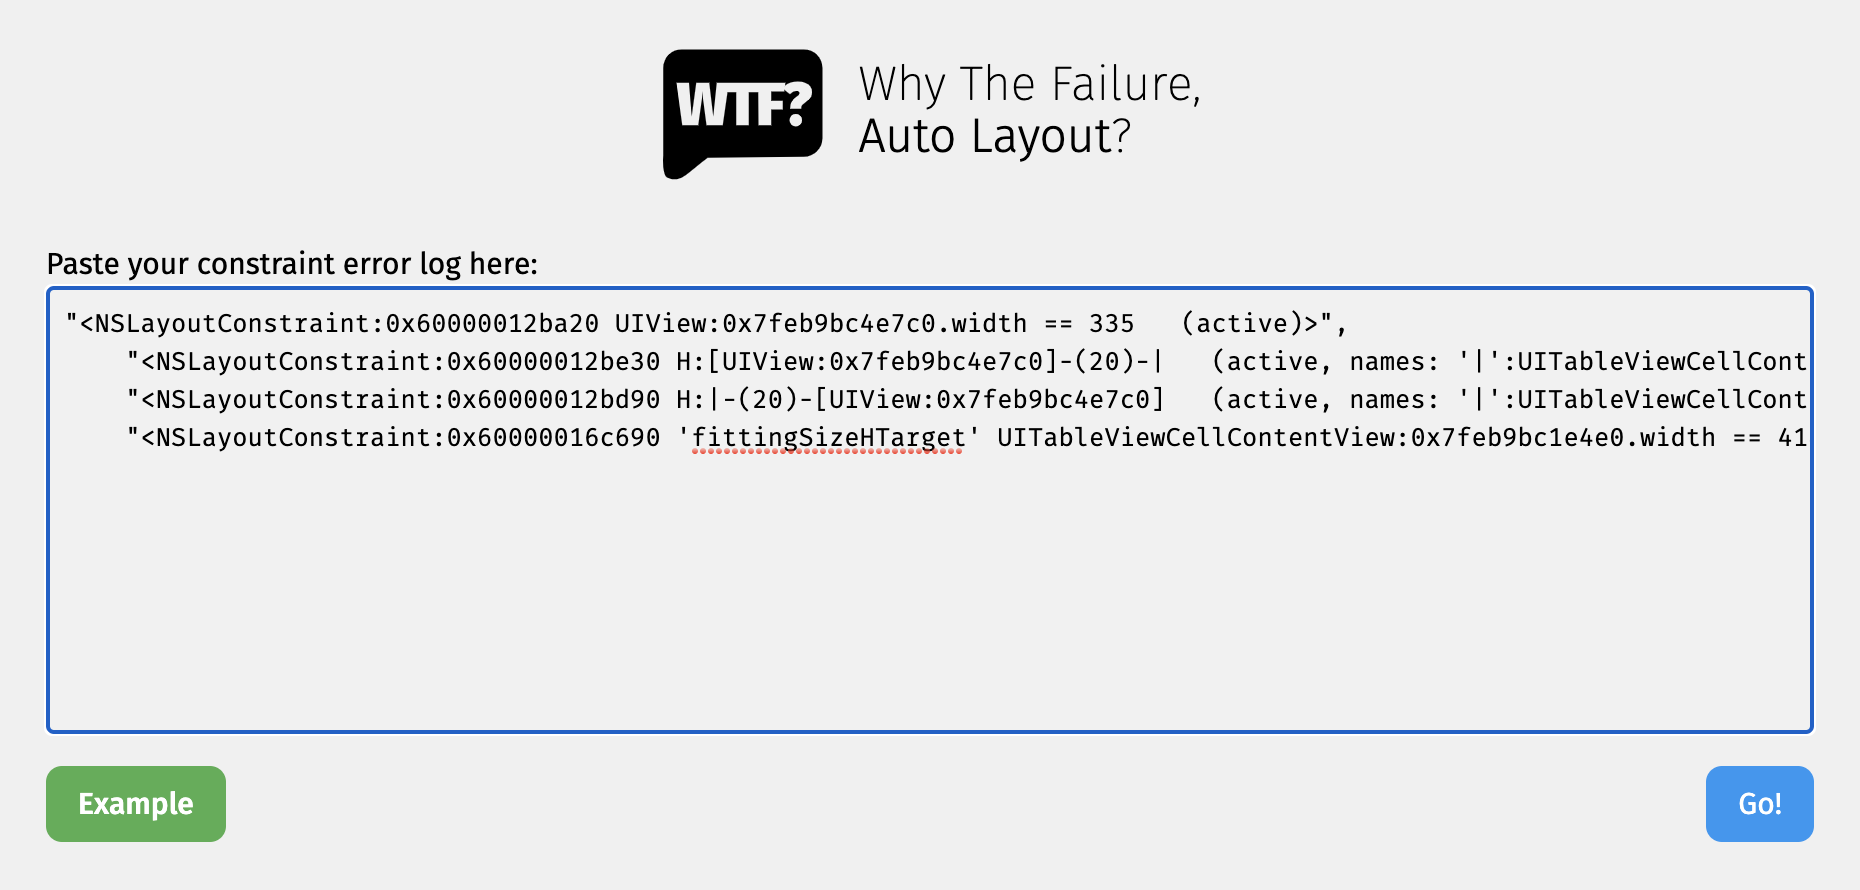
그러고 GO! 버튼을 눌러주면 내 레이아웃의 문제가 무엇이었는지를 바로 알려준다.