
 지혜의 개발공부로그
테이블 뷰 셀 커스터마이징(연습)
15 Feb 2020 | iOS개인공부 후 자료를 남기기 위한 목적임으로 내용 상에 오류가 있을 수 있습니다.
테이블 뷰 셀 커스터마이징
이제 데이터를 동적으로도 받아오는 방법을 익혀보았으니, 셀을 커스터마이징을 해보도록 하자!
main.storyboard 로 가봅시다.
- tableViewCell 을 하나 추가해준다.
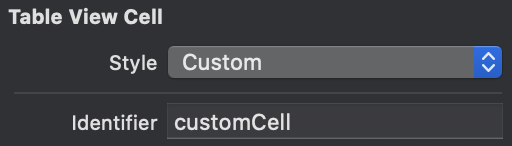
- style: Custom 으로 설정해준다.
- Identifier: customCell 로 지정해준다.
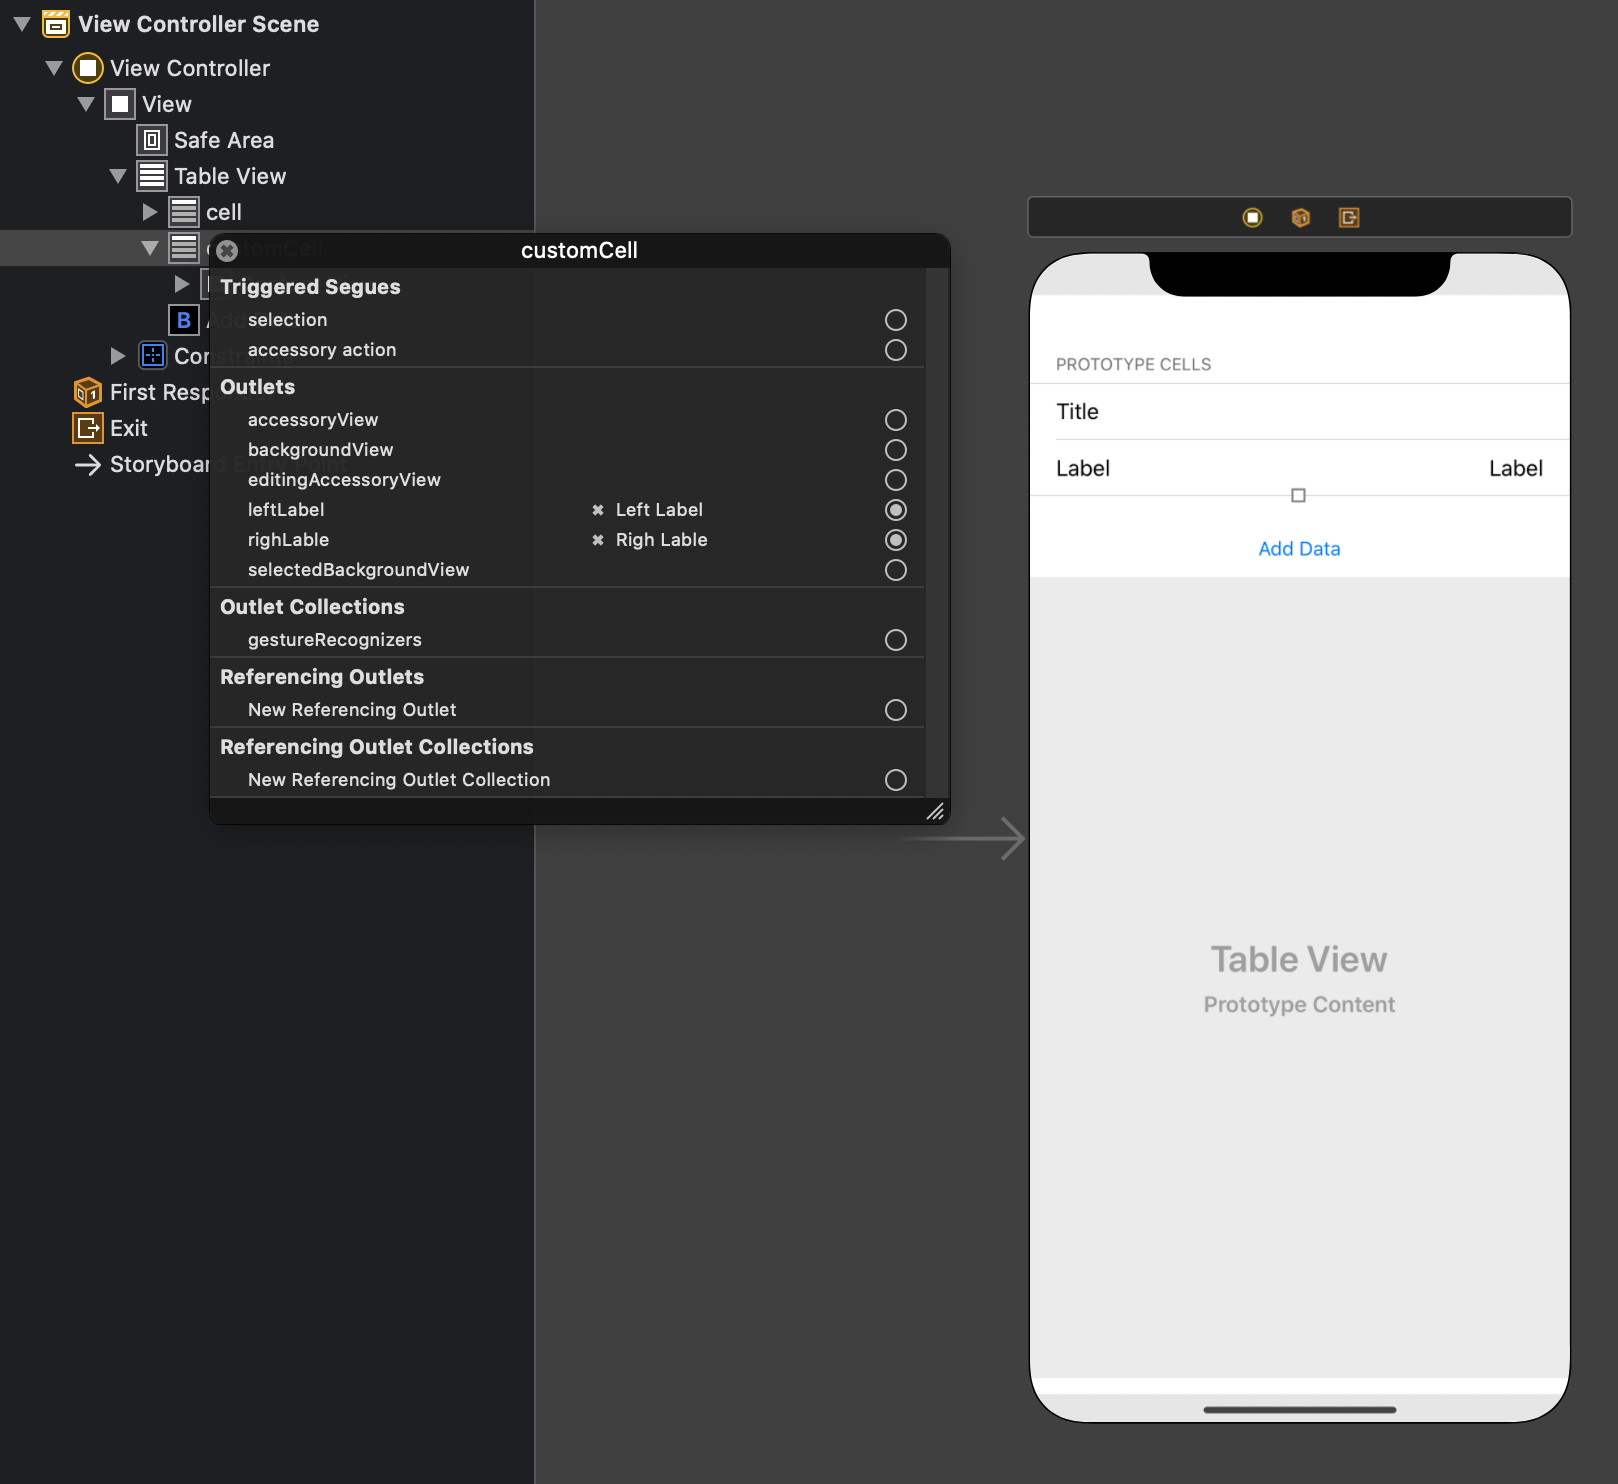
- 해당 셀 위에 레이블 두개를 추가해준다.
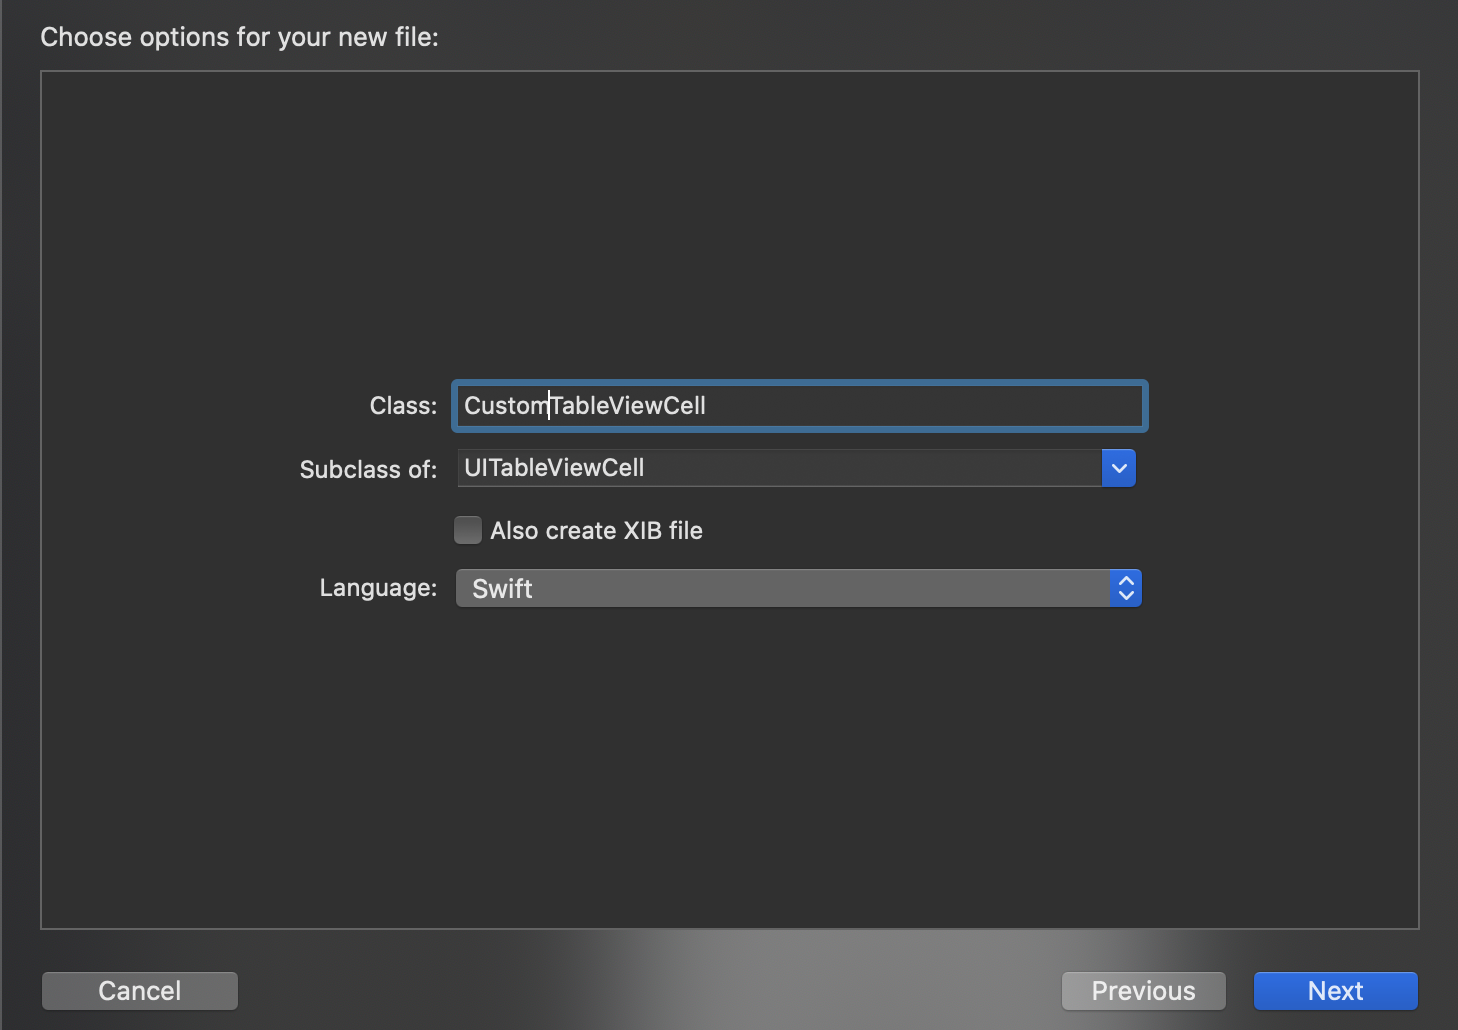
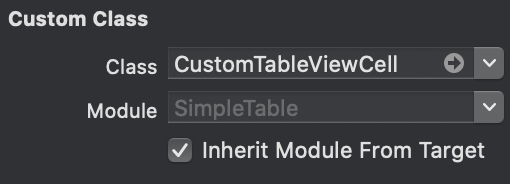
- 셀의 인스턴스 클래스를 만들기 위해 코코아터치 클래스를 생성해준다.
각각의 레이블이 행할 outlet을 만들어준다.
import UIKit

class CustomTableViewCell: UITableViewCell {

    @IBOutlet var leftLabel: UILabel!
    @IBOutlet var righLable: UILabel!

    override func awakeFromNib() {
        super.awakeFromNib()
        // Initialization code
    }

    override func setSelected(_ selected: Bool, animated: Bool) {
        super.setSelected(selected, animated: animated)

        // Configure the view for the selected state
    }

}
그리고 다시 main.storyboard로 이동합니다. > 각각의 커스텀셀의 인터페이스를 완성해봅시다.
이를 실제로 테이블뷰에서 사용하기 위해서는 viewController로 이동!
import UIKit

class ViewController: UIViewController, UITableViewDelegate, UITableViewDataSource {

    @IBOutlet weak var tableView: UITableView!
    let cellIdentifier: String = "cell"
    let customCellIdentifier: String = "customCell"

    let korean: [String] = ["가", "나", "다", "라"]
    let english: [String] = ["a", "b", "c", "d"]

    var dates: [Date] = []

    let dateFormatter: DateFormatter = {
        let formatter: DateFormatter = DateFormatter()
        formatter.dateStyle = .medium
        return formatter
    }()

    let timeFormatter: DateFormatter = {
        let formatter: DateFormatter = DateFormatter()
        formatter.timeStyle = .medium
        return formatter
    }()

    @IBAction func touchUpAddBtn(_ sender: UIButton) {
        dates.append(Date())
//        self.tableView.reloadData()
        self.tableView.reloadSections(IndexSet(2...2), with: UITableView.RowAnimation.automatic)
    }


    override func viewDidLoad() {
        super.viewDidLoad()
        // Do any additional setup after loading the view.
        self.tableView.delegate = self
        self.tableView.dataSource = self
    }

    func numberOfSections(in tableView: UITableView) -> Int {
        return 3
    }

    func tableView(_ tableView: UITableView, numberOfRowsInSection section: Int) -> Int {
        switch section {
        case 0:
            return korean.count
        case 1:
            return english.count
        case 2:
            return dates.count
        default:
            return 0
        }
    }

    func tableView(_ tableView: UITableView, cellForRowAt indexPath: IndexPath) -> UITableViewCell {

        if indexPath.section < 2 {
            let cell: UITableViewCell = tableView.dequeueReusableCell(withIdentifier: self.cellIdentifier, for: indexPath)
            let text: String = indexPath.section == 0 ? korean[indexPath.row] : english[indexPath.row]
            cell.textLabel?.text = text
            return cell

        } else {
            let cell: CustomTableViewCell = tableView.dequeueReusableCell(withIdentifier: self.customCellIdentifier, for: indexPath) as! CustomTableViewCell
            cell.leftLabel.text = self.dateFormatter.string(from: self.dates[indexPath.row])
            cell.righLable.text = self.timeFormatter.string(from: self.dates[indexPath.row])
            return cell
        }
    }

    func tableView(_ tableView: UITableView, titleForHeaderInSection section: Int) -> String? {
        if section < 2 {
            return section == 0 ? "한글" : "영어"
        }
        return nil
    }
}